[CCP14 Home: (Frames | No Frames)]
CCP14 Mirrors: [UK] | [CA] | [US] | [AU]

(This Webpage Page in No Frames Mode)

CCP14

Tutorials and Examples

Louis Farrugia's WinGX Single Crystal Suite

Creating Rendered Structures using Ortep-3 and Povray - with Rendered Atom Labels

The CCP14 Homepage is at http://www.ccp14.ac.uk

[Tutorials page] | [WinGX Tutorial Index] | [WinGX Rendered Structures Index]

The following do not show WinGX rendering at its best, refer to the Gallery at Louis Farrugia's site - [Home Site | CCP14 UK Mirror]


Obtaining Ortep-3 and Povray


Povray - Freeware Persisence of Vision Ray Tracing

Povray - Freeware Persisence of Vision Ray Tracing


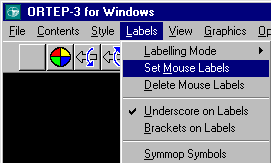
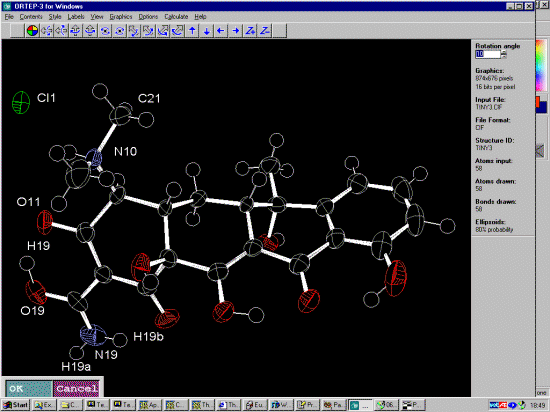
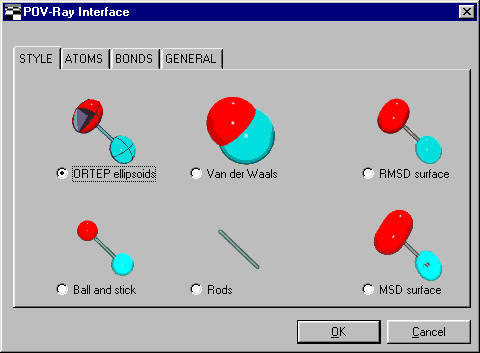
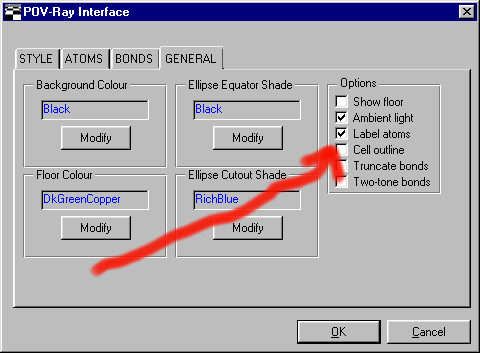
The trick to render Povray images of crystal structures using Ortep-3 is to use "mouse labels" - which the File, Write Povray File interface will allow you to select a Label Atoms option under the GENERAL tab. Thus atom labels will then be rendered by Povray.

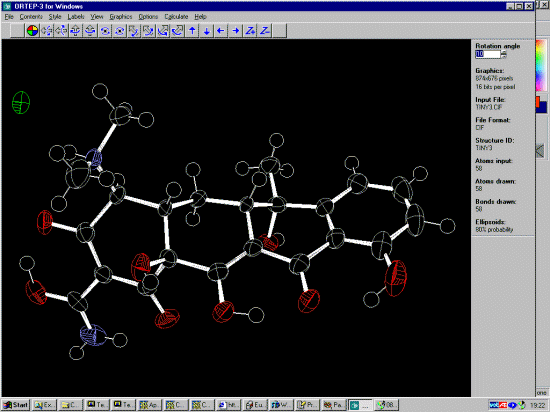
Open up the structure in Ortep-3 which can read a variety of file formats including CIF, Shelx, GSAS, Fullprof and Rietica-LHPM Rietveld

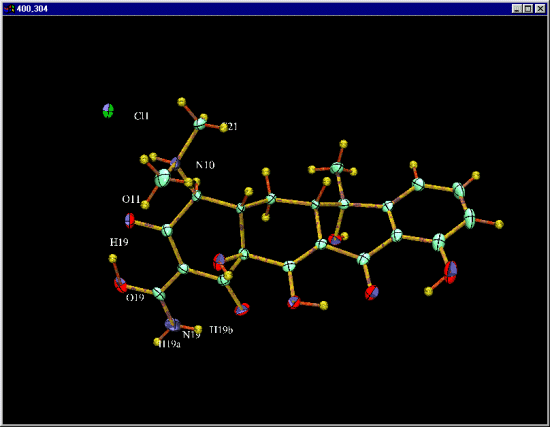
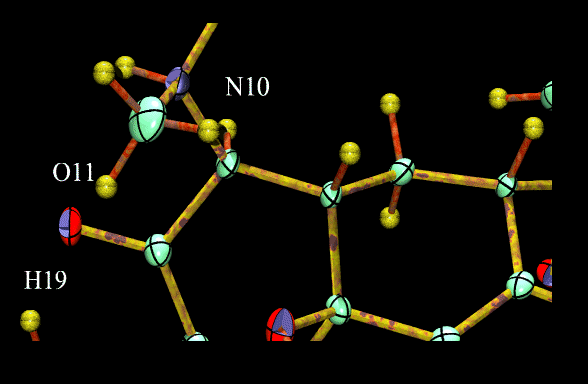
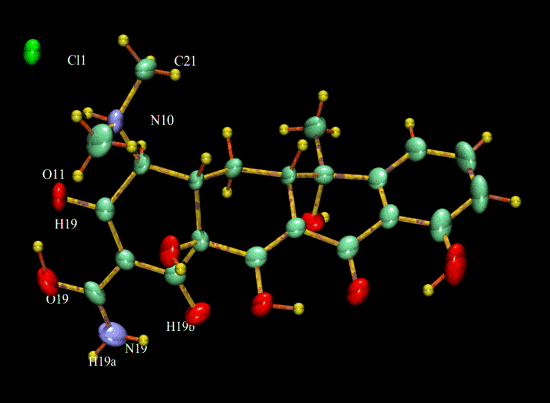
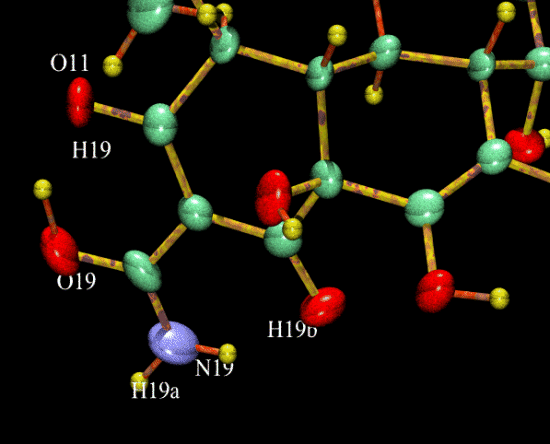
In this case the structure is of tetracycline hydrochloride - "Tetracycline hydrochloride: a synchrotron micro-crystal study" Clegg W. & Teat S.J. Acta Cryst., C56 , 1343-1345 (2000)).

Do File, Open File and select the structure file of interest and get the view you want (or do cell packing via the Contents Menu).

Open up the structure in Ortep-3


Select Labels, Set Mouse Labels and i) click on the atom of interest, then ii) where you want the atom to be and iii) then the bottom left OK icon. Repeat until happy then select the Cancel to get out of Mouse Labels Labels mode.

Select Labels, Set Mouse Labels

Set Mouse Labels Mode

Now out of Set Mouse Labels Mode


Now select File, Write POV-ray File and select the rendering options you wish to have (including "Label Atoms" under General) Labels mode.

Povray File creation Interface within Ortep-3

Povray File creation Interface within Ortep-3

Povray File creation Interface within Ortep-3

Povray File creation Interface within Ortep-3


You should now have a Povray file (Titled Ortep0xx.pov) in the same directory as your structure file. Go into the Windows Explorer (or your favourite File Manager) and select (double click on) the file to automatically spawn Povray.

Select using the top left dialoge the resolution you wish to render the image at (800x600 is shown here) and then click on the Run icon.

Ortep-3 and Povray rendered structure image

Povray in action


If you don't like the results - play with the various options until you find something you do like. If you only want a bit of the structure, you can also render at higher resolution and crop the image. The image at the bottom of this webpage is using "rusty_iron" bonds; "rust" H-bonds; and "speckled finish" atoms.

Ortep-3 and Povray rendered structure image

Ortep-3 and Povray rendered structure image


Ortep-3 and Povray rendered structure image

Ortep-3 and Povray rendered structure image


[Tutorials page] | [WinGX Tutorial Index] | [WinGX Rendered Structures Index]

[CCP14 Home: (Frames | No Frames)]
CCP14 Mirrors: [UK] | [CA] | [US] | [AU]

(This Webpage Page in No Frames Mode)

If you have any queries or comments, please feel free to contact the CCP14